
Choose the phase before you choose anything else. A Phase 1 and a Phase 2 clone trooper helmet look related and share almost no parts, so every kit, printable file and vendor listing is built for exactly one of them. Get that fork wrong and the rest of the build cannot be corrected by spending more.
What’s on This Page
- Phase 1 or Phase 2: what actually changed
- Why there is no worn helmet to copy
- Three routes into a wearable
- Where the budget really goes
- Five measurements before you buy
- The parts nobody puts on the list
- Pairing a Jedi to the trooper
- If you want club approval
- Six things first builds get wrong
- What six hours in armour is like
Phase 1 or Phase 2: What Actually Changed
Phase 1 is a round dome with a full-length fin running brow to back. Phase 2 drops the fin for a raised central ridge and sharpens the cheeks. Nothing between the two is interchangeable, including the visor lens.
The two designs were separated by three years of production and a deliberate change of silhouette, not by a paint scheme. They read as two different helmets that belong to the same army.
Phase 1 has a smooth, almost organic dome. The fin runs the whole length of the crown and ends at the back in a flat panel that costumers describe as a brake light cover.
The visor is a single continuous grey T. Twisting your head does not change the shape of the opening, which is why the older helmet feels less aggressive on camera.
Phase 2 removes the fin entirely and replaces it with a raised ridge along the centre line. The dome flattens, the cheek areas angle in, and the vertical part of the T narrows until the face is mostly shadow.
That geometry is what makes Phase 2 read as the ancestor of the later stormtrooper helmet rather than as a clone helmet with a new paint job.
| Feature | Phase 1 | Phase 2 |
|---|---|---|
| Screen debut | 2002 | 2005 |
| Crown | Full-length fin, brow to nape | No fin; raised central ridge |
| Rear of crest | Flat panel with visible cover | Closed, flush to the dome |
| Visor | Continuous grey T, wide verticals | Narrow verticals, heavy cheek shadow |
| Cheek vents | Small vents, several per side | Fewer, larger, built into the cheek |
| Dome markings | Rank stripes and unit colour | Full unit scheme, including cheek bars |
| Neck opening | Open; ring needed above entry level | Open; ring needed above entry level |
| Shared parts | None | None |
The last row is the one that costs people money. A helmet bought for Phase 1 will not accept Phase 2 ears, and a shoulder bell shaped for one phase sits wrong on the other.
Decide on a specific trooper, not on a phase in the abstract. Unit markings, weathering and rank all change the shopping list, and a phase decision made first narrows every later choice correctly.
Why There Is No Worn Helmet to Copy
Every clone trooper in the films was computer generated. There is no physical helmet from 2002 or 2005 sitting in an archive to cast from, so accuracy in this hobby means accuracy to a render.
That single fact rearranges the whole category. A stormtrooper build can trace its shapes to an object that was fabricated, worn and photographed. A clone build traces its shapes to a digital model, and every physical version of it is somebody’s interpretation.
Physical clone helmets do exist, and none of them are film-used in the sense a buyer usually means. They are promotional pieces, later production work, or fan sculpts refined over years of group feedback.
So a listing that advertises screen-used lineage for a clone helmet is describing something narrower than the phrase suggests, usually a sculpt that was measured against stills rather than a mould taken from an object.
The costuming community filled that gap in a predictable order, and the order explains why the parts you can buy today fit together at all.
The practical consequence is that two people can both be correct about what a clone trooper helmet looks like and still disagree about proportions by a few millimetres, because the source is a render that never had to fit a human head.
Three Routes Into a Wearable
Foam, printed and vacuum-formed shells land in wildly different price brackets, and the spread is smaller than the difference in the work you sign up for.
There are three materials in common use and each one decides the tooling you will need before you can start.
| Route | Material | Reported cost band | Tools before you start | Weight | Weak point |
|---|---|---|---|---|---|
| Foam build | Closed-cell EVA sheets | Roughly $200 to $550 | Heat gun, craft knife, contact cement | Lightest | Seams and softness read at close range |
| 3D printed | PLA or PETG | Roughly $260 to $1,250 | Printer, slicer, filler primer | Heaviest | Layer lines; print time measured in weeks |
| Vac-formed kit | Thermoformed ABS | Roughly $220 to $830 loose; $300 to $700 assembled | Drill, rivets, heat for shaping | Moderate | Pull lines, and a kit that arrives as flat shell halves |
Those bands come from build communities and hobby forums rather than from a price list, so treat them as planning figures. They also exclude two items that decide the real total, which are the undersuit and the finish.
Foam is the route that gets a complete suit onto a convention floor fastest, and the route that photographs worst in daylight. Closed-cell foam has no specular highlight, so a foam helmet reads as flat and soft next to any hard shell.
Printing gives the sharpest detail and the heaviest helmet. A full print in PLA sits noticeably heavier than a vac-formed shell of the same volume, and the weight lands on your neck rather than your shoulders.
Vac-formed ABS is what most assembled kits on the market are made from, because the same mould can be pulled many times and the shell comes out thin and rigid. It arrives as separated halves with trim lines you cut yourself.
A complete assembled Phase 2 trooper that is ready for club review is commonly put around the $2,000 mark once the helmet, armour, undersuit, boots and paint are added together. That figure is a community average, not a retail price.
Where the Budget Really Goes
Paint, primer, filler and sanding consume more hours than the shell does, and they are the difference between something that reads as armour and something that reads as a craft project.
Film armour is not a clean gloss white. It is a matte, faintly dirty off-white with a slight sheen on the raised edges and grey settling into every recess.
That is a finishing decision rather than a material one, and it is the single most common reason a first kit looks wrong while being technically complete.
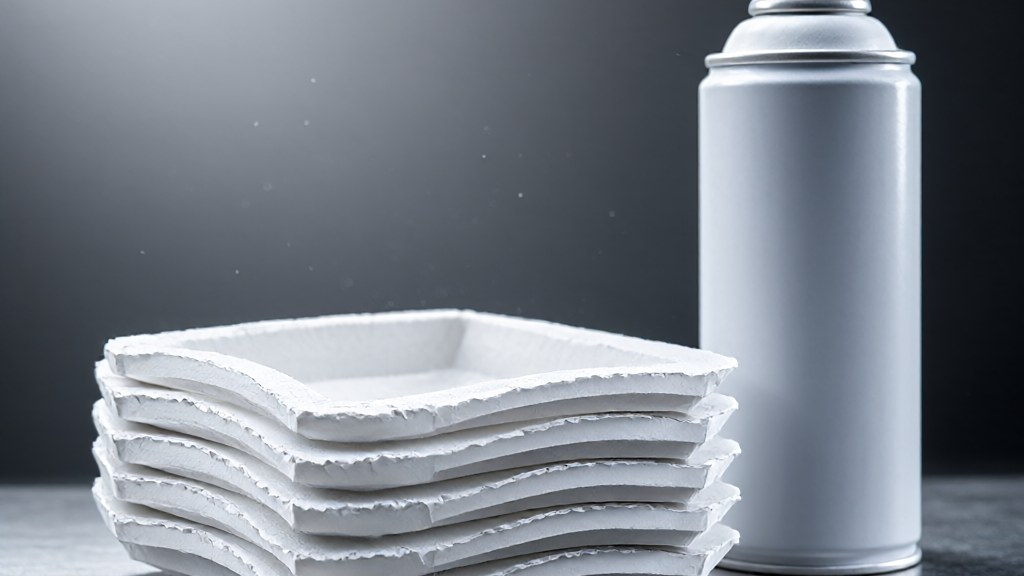
Expect to spend more time on the finish than on assembly. Filling seam lines, priming, wet sanding through a couple of grits, then topcoat, flattening and weathering is a sequence you repeat surface by surface.
Gloss is the trap. A high-gloss topcoat photographs like a motorcycle helmet, throws hard reflections across every curve, and makes the moulding lines you just filled visible again.
A matte or satin clear coat over a slightly warm white is much closer to how the design reads on screen, and it forgives surface defects that gloss will not.
Weathering is a smaller job than it sounds and worth doing on a first build. A diluted grey wash brushed into recesses and wiped off the high points costs an afternoon and hides most of what the primer did not.
Five Measurements Before You Buy
Head circumference, head height, shoulder width, chest depth and shoe size decide whether a kit fits you, and none of them appear on the size charts these kits are sold with.
Helmet sizing is not by hat size. The interior has to clear your nose, your ears and the back of your skull, and it has to let your head rotate inside the shell.
- Head circumference at the widest point, tape snug but not compressed
- Head height from chin to crown, because the visor opening sits high
- Shoulder width from the bony point of one shoulder to the other, which sets the chest plate span
- Chest depth from sternum to spine, which decides whether the back plate sits flush
- Boot size and calf measurement, since shin pieces are sized to the boot rather than the leg
Do the head measurements twice, once in the morning and once at night. Circumference moves more than people expect with hair and hydration, and a helmet trimmed to a morning number can be uncomfortable by the afternoon.
Take the shoulder measurement across the back rather than the front. The front number includes the chest, and every kit spec that matters is quoting the skeletal span.
The Parts Nobody Puts on the List
An undersuit, a neck seal, gloves and boots are four separate purchases, and a complete kit looks incomplete without every one of them.
Armour sits over a black base layer. Without it the gaps at the knees, elbows and waist show skin, and the whole assembly stops reading as a sealed suit.
The base layer needs some texture rather than a smooth compression shirt. Ribbed panels at the joints and a matte finish photograph much closer to the on-screen undersuit than a plain black top does.
The neck seal is the piece most often forgotten. Armour and helmet rarely meet cleanly, and the visible gap between collar and dome is the first thing anyone standing beside you notices.
Gloves follow the same logic. A black work glove reads correctly at any distance; a leather driving glove does not, because the cuff and stitching are the wrong shape in silhouette.
Boots decide the shin fit. Shin pieces are cut to wrap a boot shaft, so buying armour first and boots second usually ends with a shin plate that does not close.
Pairing a Jedi to the Trooper
Group builds almost always mix eras, and the Jedi side of the same scene is a fabric kit rather than a hard-shell one, which makes it a different and much cheaper project.
A trooper build is a materials project. A Jedi build is a fabric and dye project, and the two finish on completely different timelines.
Where a trooper kit needs months of surface work, a layered robe set can be wearable in a week. For a pair or a group, that mismatch is worth planning around rather than discovering at the deadline.
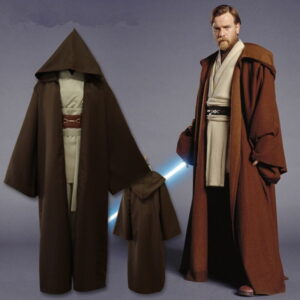
The costume we carry is a layered set in cotton with the outer cloak and the inner tunic as separate pieces. That matters at a distance because a single-piece robe has no shadow line between the layers and reads flat in photographs.

If the pair is a trooper and a Jedi from the same campaign, the saber is the one part of the Jedi build that cannot be improvised. A hilt that is too light swings wrongly, and a hilt that is too long cannot be worn on a belt without catching.
The pairing rules we follow for conventions, including blade length against body height, are set out in our technical reference for convention-ready sabers.
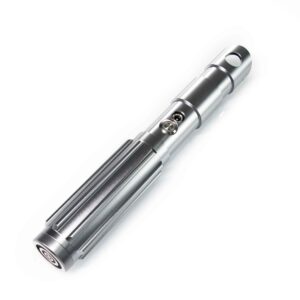
That hilt is a two-handed pattern, which is the correct shape for the era a trooper build usually sits in. Single-handed hilts look right on a belt and feel wrong in a photograph next to armour.
If You Want Club Approval
The costuming club that sets the standards requires you to be eighteen, to match a written reference exactly, and to submit photographs from five angles before anyone reviews the build.
Approval is not a quality judgement, it is a conformity test. A beautifully finished helmet that does not match the reference is rejected, and an average one that does match is approved.
The requirements layer on top of each other. Level one is the base costume, level two adds the appearance of a neck ring, and level three requires the neck ring to actually seal and the rear cover on the crest to be lit.
That escalation is why so many builds stall between levels two and three. The lit crest panel is a small part of the helmet and a disproportionate part of the work.
One distinction catches people out: realistic interpretations of characters who only appeared in animation are not reviewable under the realistic standards. A unit that exists only in a stylised series needs the stylised reference instead.
Five photographs is the other practical constraint. Front, back, both sides and a detail shot, taken in the costume with the helmet on, because the reviewer needs to judge how the parts meet on a body.
Six Things First Builds Get Wrong
The six are a phase bought twice, a gloss finish, an untrimmed shell worn once, boots bought last, a helmet sized to a hat, and armour stored in a hot car.
- Buying across phases. A Phase 1 helmet and a Phase 2 chest plate are two different costumes, and neither will sit correctly on the other.
- Chasing gloss. Film armour is matte and slightly dirty; gloss shows every moulding line and reads as plastic at any distance.
- Wearing a raw shell. Untrimmed pull lines and visible flash at the edges are the most legible sign of a first build, and they are cheap to remove.
- Buying armour before boots. Shin plates wrap the boot shaft, so the boot diameter decides whether the last two pieces close.
- Sizing the helmet to a hat size. Interior clearance for nose, ears and skull rotation is what actually matters.
- Storing the kit in a hot car. Thermoformed shells soften and warp well below the temperature a parked car reaches in summer.
The last one is the quiet one. A warped chest plate cannot be flattened back to shape without heat and a mould, and it usually happens on the way home from a first event.
The first one is the expensive one, because it is the only mistake on the list that cannot be fixed by effort.
What Six Hours in Armour Is Like
Heat builds faster than most people plan for, peripheral vision is gone, and a full costume is a ninety-minute costume with breaks rather than a full-day one.
Armour is a sealed shell over a base layer. There is nowhere for heat to go, and the helmet traps it around the head and neck where it matters most.
The visor is the second constraint. The vertical opening is narrow, so looking left or right means turning the whole torso, and stairs need to be taken slowly and watched.
Hearing is muffled to the point that conversation happens at close range and mostly in one direction. Many builds add a small fan and a wireless microphone for exactly this reason, and both belong in the budget from the start.
Sitting is limited, drinking needs a straw, and the helmet has to come off to eat. Events with a long panel schedule are harder than events with a long floor plan.
None of that is a reason not to build one. It is the reason a trooper kit works better as one half of a pair than as a solo costume for a full day, which is where the Jedi side of a group build earns its place.
A History of the Clones
71 Types of Troopers
Convention-Ready Sabers
Cosplay Costume Pairings
Frequently Asked Questions
Q1: What is the difference between a Phase 1 and a Phase 2 clone trooper helmet?
A: Phase 1 has a rounded dome with a full-length fin running from brow to nape, and a wide continuous T visor. Phase 2 removes the fin for a raised central ridge, flattens the dome, narrows the visor verticals and angles the cheeks inward. The two share no parts.
Q2: Was any clone trooper armour physically built for the films?
A: No. The troopers were computer generated in both films that introduced them, so no physical helmet was fabricated and worn. Every clone helmet in existence is a later production piece, a promotional item or a fan sculpt.
Q3: How much does a clone trooper costume cost?
A: Reported build costs run roughly $200 to $550 for foam, $260 to $1,250 for printed, and $220 to $830 for a loose vacuum-formed kit. A fully assembled set that is ready for club review is commonly put near $2,000 once undersuit, boots and paint are included.
Q4: How long does a clone trooper build take?
A: A vacuum-formed kit bought assembled can be wearable within days. Foam builds run several weeks. A printed kit runs weeks to months of print time alone before any surface work begins.
Q5: Why does my white armour look wrong compared with the films?
A: Because the reference is matte, slightly warm off-white with grey settling into recesses, and a gloss white topcoat is not. Gloss also throws hard highlights that re-expose every moulding line you filled.
Q6: What do I need to measure before ordering a kit?
A: Head circumference, head height from chin to crown, shoulder width across the back, chest depth from sternum to spine, and boot size with calf measurement. Kit listings rarely publish all five.
Q7: What is usually missing from a first kit?
A: The undersuit, the neck seal, gloves and boots. Each is a separate purchase, and the neck seal in particular covers the gap between collar and helmet.
Q8: Can a clone trooper costume be approved by a costuming club?
A: Yes, subject to the clubs own standards. That means being eighteen or over, matching a specific written reference, and submitting photographs from five angles. Higher levels require a neck ring that seals and a lit cover on the rear of the crest.
Q9: Are animated-series clone troopers approvable in realistic form?
A: Generally not. Realistic interpretations of characters that only appeared in animation are reviewed against the stylised reference instead, so a realistic build of an animated unit falls between the two.
Q10: What is the best material for a first build?
A: Vacuum-formed ABS if you want a rigid shell without owning a printer, foam if speed of completion matters most, and printed parts only if you already have a printer and can accept the weight and print time.
Q11: How long can you wear a full clone trooper costume?
A: Around ninety minutes of continuous wear before a break is realistic. Heat and restricted vision, not weight, are the limiting factors, and a helmet fan plus a wireless microphone extends the window considerably.
Q12: Does a clone trooper cosplay need a lightsaber?
A: A trooper carries a blaster in the fiction. A saber is only correct if the costume is paired with a Jedi build in the same group, which is why the Jedi half of a group costume is the part that needs one.