
“Combat ready” is not a marketing tier or a blade colour. It is five build decisions made at the factory — blade retention, socket depth, blade wall, switch guarding, and how the electronics are mounted — and a saber that misses any one of them will loosen, rattle, or cut out before the second session.
The phrase gets used loosely. In practice it describes a set of structural choices, and those choices are visible before you buy anything.
This page sets out the five decisions in the order they fail, explains what each one is protecting against, and ends with the checks you can run on a saber in your hands.
It is not a duelling guide. It is a build standard.
What’s on This Page
- The Five Build Decisions
- Blade Retention — Screws, Not Friction
- Socket Depth — Where Force Enters the Hilt
- Blade Wall — The Flex vs Brightness Trade
- Switch Guarding — Against Accidental Activation
- Electronics Mounting — What Survives a Hit
- Five Checks on a Saber in Your Hands
- Frequently Asked Questions
The Five Build Decisions
A combat ready saber is defined by five decisions: how the blade is held, how deep it sits in the emitter, how thick its wall is, how the switch is protected, and how the internal electronics are anchored. Everything else — colour, sound font, blade length — is preference.
The five are ordered by how often they cause a failure.
Retention and socket depth cause blade wobble. A blade that shifts in the emitter makes every other problem worse, because movement turns a straight push into a lever against the threads.
Blade wall decides whether the tube survives contact or takes a permanent bend.
Switch guarding decides whether the saber stays lit. An exposed button on a spinning hilt gets pressed by a grip, a sleeve, or the wielder’s own hand.
Electronics mounting decides what happens after the impacts that do land.
| Decision | Protects against | Failure if skipped |
|---|---|---|
| Blade retention | Blade shifting in the emitter | Wobble, then a cracked tube |
| Socket depth | Leverage at the emitter mouth | Thread wear, emitter distortion |
| Blade wall | Permanent bend under impact | A blade that stays curved |
| Switch guarding | Accidental press mid-swing | Sudden retraction, dropped hilt |
| Electronics mounting | Board and cell movement | Cut-outs, dead solder joints |
Blade Retention — Screws, Not Friction
A combat ready hilt holds its blade with tapped set screws driven through the emitter wall — normally M4 or M5 — tightened against a blade that has been seated by hand. Friction alone, or a single shallow screw, is not retention.
This is the first thing to check and the cheapest to fix.
The screw does one job: stop the blade rotating and sliding. A blade is a smooth round tube in a smooth round socket, and nothing about that joint resists movement on its own.
Two screws on opposite sides are better than one, because a single screw tilts the blade against the far wall of the socket instead of holding it centred.
The screw must be long enough to bite properly. A short screw engages only a thread or two in the emitter wall and strips under load, which is why fine-thread set screws are used rather than wood-style points.
On a hilt with a thumbnail or button screw, check that the head sits flush. A protruding head catches clothing and skin during a fast rotation.
Socket Depth — Where Force Enters the Hilt
Socket depth is how far the blade tube slides into the emitter before it stops. A combat ready saber wants roughly 25 mm or more. A shallow socket lets the blade act as a lever against the emitter mouth, which is the weakest point of the hilt.
The socket is the least visible part of the design and the most consequential.
Think of the blade as a lever with the socket mouth as the fulcrum. The deeper the blade sits, the shorter the exposed length that can bend, so the less force reaches the threads and shoulders.
A deep socket also keeps the blade straighter. A blade held only at the mouth can rock sideways, and that rocking is what users describe as wobble.
Depth and wall thickness work together. A thick socket wall resists distortion when the screw is tightened; a thin one can be pinched oval by the screw, which then pinches the blade.
| Socket depth | How it behaves | Suited to |
|---|---|---|
| Shallow (under 15 mm) | Blade rocks, force reaches the threads | Display and light use |
| Moderate (15–25 mm) | Stable at slow speed, wobble under fast swings | Occasional contact |
| Deep (25 mm and over) | Blade stays centred, load spreads into the hilt | Regular contact |
Blade Wall — The Flex vs Brightness Trade
Blade wall thickness controls how much impact the tube can absorb. Thin walls (about 1.5–2 mm) pass more light and look brighter but flex further; thick walls (about 2.5–3 mm) resist bending and dim the blade slightly.
This is the one decision where combat readiness trades directly against appearance.
The wall is what flexes. A blade absorbs a hit by bending and springing back. A thin wall bends more before it recovers, so the saber feels whippier and reads brighter.
A thick wall bends less. It feels stiffer, transmits more shock into the hilt, and lights slightly dimmer because more material sits in front of the LED.
Neither is wrong on its own. The point is to match the wall to the use, and to know which one you are buying.
| Wall | Flex | Brightness | Best for |
|---|---|---|---|
| Thin (~1.5–2 mm) | High | Highest | Spinning, choreography, display |
| Medium (~2–2.5 mm) | Moderate | Good | Mixed use |
| Thick (~2.5–3 mm) | Low | Reduced | Regular hard contact |
Wall thickness and wall grade are not the same thing. Two blades of the same outer diameter can have very different walls, so a 1 inch blade tells you nothing about how it will behave until you know the wall.
Switch Guarding — Against Accidental Activation
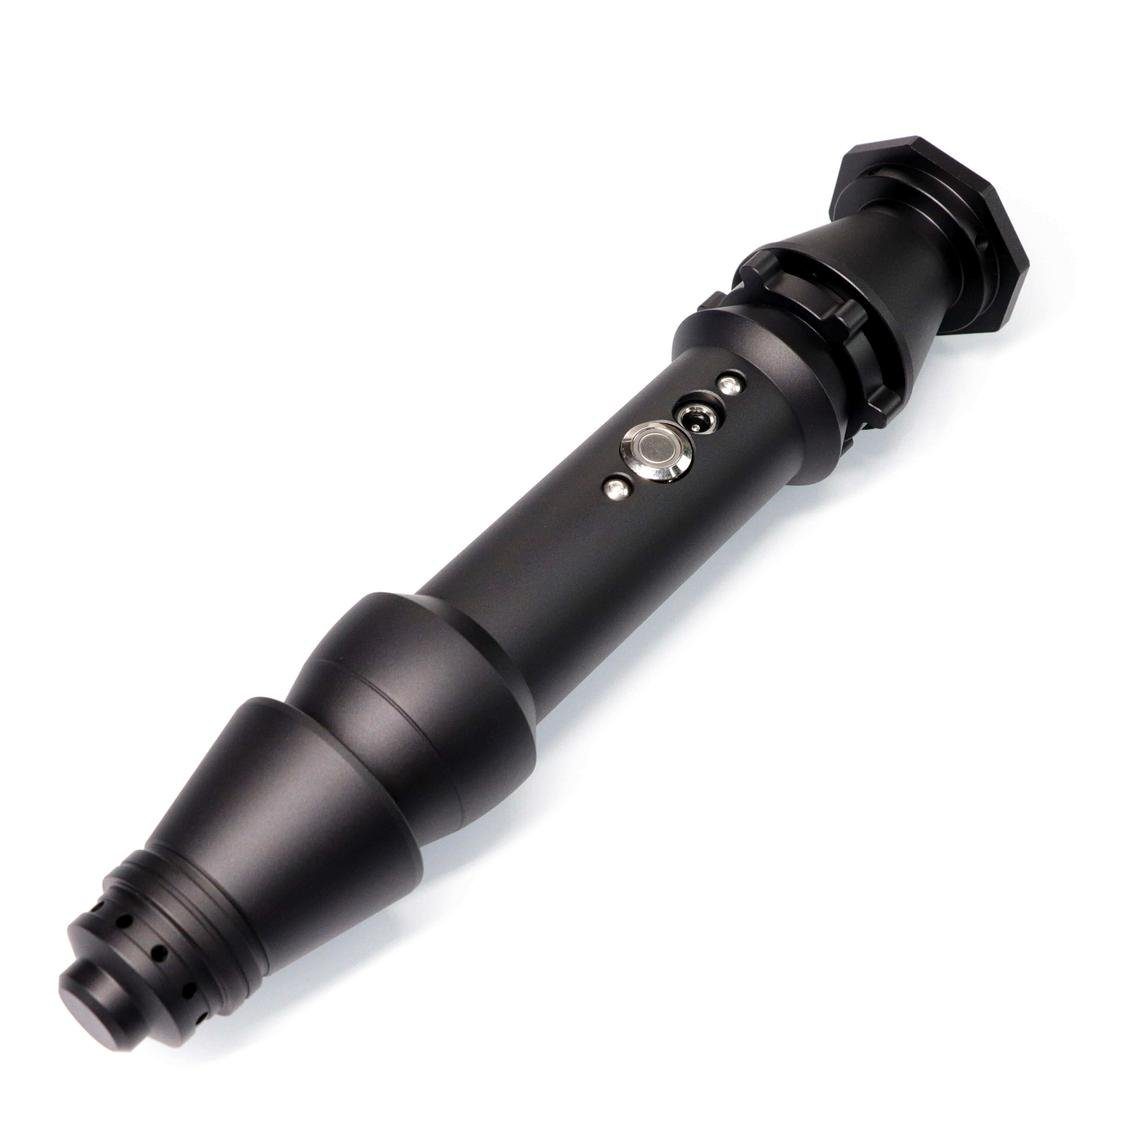
A combat ready hilt mounts its switch so the button cannot be pressed by the hand holding it. That usually means a raised collar around the button, a recessed well, or a placement away from the natural grip line.
Switch guarding is the cheapest upgrade and the one most often left out.
The failure is not dramatic; it is annoying. A palm or a finger rolls over an unguarded button during a spin, the blade retracts mid-motion, and the hilt is now in the air.
A raised collar raises the button above the surrounding surface, so a sliding hand passes over it rather than pressing it.
A recessed well does the opposite. It sinks the button below the body so only a deliberate fingertip reaches it. Either works; a bare button on a smooth barrel does not.
Placement matters as much as the guard. A button placed off the main grip axis is unlikely to be touched by accident at all.
Electronics Mounting — What Survives a Hit
Inside a combat ready hilt, the sound board, speaker and battery holder are held in a chassis or shock mount so they cannot shift. In a display hilt they are often loose in the tube, which is fine until the saber is used.
Everything up to this point is about the outside. This one is about what happens after the impact travels inward.
A board that can move will move, and eventually a solder joint cracks. The symptom arrives late — a saber that cuts out on a particular swing, or a speaker that crackles at an angle.
A battery holder matters for the same reason. A large cell like an 18650 has real mass, and a loose holder lets it slam into the board on every hard stop.
A speaker needs a sealed face as well as a mount. Sound escapes and is shaped by the pommel vents, so a speaker rattling against a plastic wall sounds thin no matter how good the font is.
None of this is visible from outside. It is the main reason two sabers with identical exteriors can behave very differently after a season of use.
Five Checks on a Saber in Your Hands
You can verify all five decisions without opening anything: rock the blade, read the socket, flex the tube, press the button, and shake the hilt. Each check takes seconds and maps to one of the build decisions above.
The order below follows the failure order, so the first check is the one that matters most.
Force from a strike enters at the blade and leaves through the set screw, the socket wall and the emitter shoulder. A shallow socket or a single short screw sends that force into the thinnest part of the hilt.
Run the checks in this order:
Check one is the decisive one. If the blade rocks in the emitter, the saber is not ready regardless of how the other four look, because every swing will work the screw and the socket a little looser.
For the deeper references these decisions sit on, see collector-grade hilt construction, the anatomy of the three systems, and the two light-source architectures.
Frequently Asked Questions
Q1: What makes a lightsaber combat ready?
A: Five build decisions: the blade is held by tapped set screws rather than friction, the emitter socket is roughly 25 mm deep or more, the blade wall is thick enough to resist permanent bending, the switch is guarded against accidental presses, and the electronics are held in a chassis so they cannot shift.
Q2: Can any lightsaber be duelled with?
A: Any saber can be swung and any blade can be struck once. Combat ready describes how many sessions it survives. A display hilt with a shallow socket and a loose board will loosen and cut out; a built hilt will not.
Q3: How deep should a lightsaber blade socket be?
A: Roughly 25 mm or more for regular contact. Under 15 mm the blade can rock and the force reaches the emitter threads. Between the two it is stable at slow speed and starts to wobble under fast swings.
Q4: Is a thicker blade better for duelling?
A: For hard contact, yes — a 2.5–3 mm wall resists permanent bending better than a 1.5–2 mm one. It is also slightly dimmer and transmits more shock into the hilt. Thin walls suit spinning and display, where flex and brightness matter more.
Q5: What size screws hold a lightsaber blade in place?
A: Most commonly M4 or M5 set screws, tapped through the emitter wall and tightened onto the blade. Two screws on opposite sides hold the blade centred better than one, which tends to tilt it against the far wall of the socket.
Q6: Why does my lightsaber blade wobble?
A: Two usual causes: the blade is not fully seated in the socket, or the socket is shallow enough that the blade rocks at the emitter mouth. Tightening the set screws helps only if the blade is already pushed all the way in.
Q7: Do you need special blades for duelling?
A: You need a blade whose wall thickness matches the use, in the diameter your emitter accepts, normally 1 inch. The saber side matters as much: a thick blade in a shallow socket still loads the emitter threads.
Q8: What happens if a lightsaber switch gets pressed during a swing?
A: The blade retracts mid-motion. On the ground that is an inconvenience; in the air it means a falling hilt. Guarding the switch with a raised collar or a recessed well, or moving it off the grip axis, prevents the press entirely.
Q9: Can I make a display lightsaber combat ready?
A: Partly. Blade retention and switch guarding can be improved with screws and a guard. Socket depth and electronics mounting are fixed by the hilt, so a shallow socket stays shallow.
Q10: Does a heavier lightsaber mean it is combat ready?
A: No. Weight usually comes from the hilt’s mass, not from how well the blade is held. A heavy hilt with a shallow socket and one short screw still loosens. The five decisions are about structure, not mass.
Related reading on this site: the full hilt anatomy reference, the complete blade reference, and how screen accuracy is judged.